Gothic Geometry with a Popsicle Stick
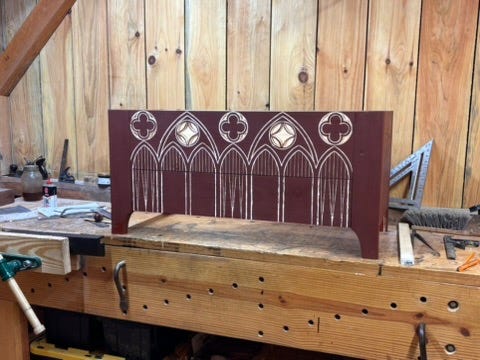
Laying out and engraving a blanket chest

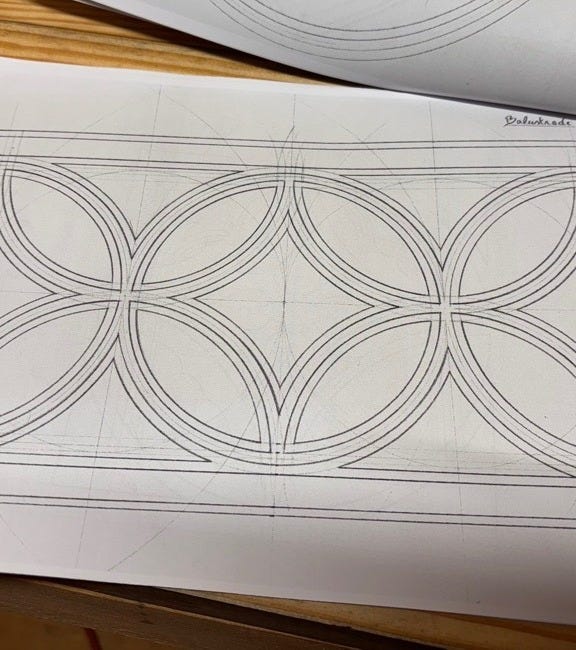
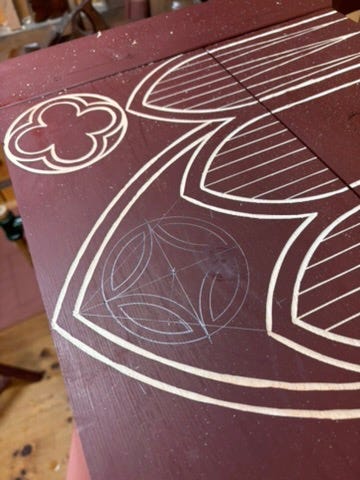
The Quatrefoil (below) is a geometric design commonly employed by medieval/gothic builders. It is essentially a pattern of circles within circles.

The design I used on my recent blanket chest is not a quatrefoil, but a closely related variation. The image from which I drew my inspiration simply has it labeled “Balustrade”, and which I have termed a “reverse quatrefoil”. It is composed of a series of arcs that all have the same radius (the compass setting never changes), and are swung from the four corners of a square in the opposite direction of a typical quatrefoil:
Laying out a (reverse) quatrefoil:
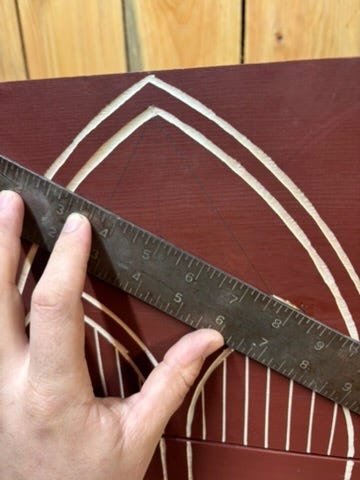
Begin by establishing a center point. You could do this at random on a blank sheet of paper. If you are inserting a reverse quatrefoil underneath an arch like I was, you will need to find the center point by first drawing a triangle. Drop a square line down from the apex of the arch. Then connect the apexes of all three arc tips with a straight line, creating a triangle between them.

Next, we need to find the center/middle of the two vertical sides of the triangle. You can do this with fancy math, or you can grab a pair of dividers and step it off. Set your dividers to what you estimate is half the distance of the line, place one leg at either end, and step along the line towards the opposite side. When you can swing the dividers 180 degrees back and forth, hitting each endpoint of the line without moving the middle leg, you have found the center. Mark the line.
Using a straight edge, connect each of these center marks with the corner opposite to them. Draw a line. Where these lines intersect with the triangle’s vertical center line, is the geometric center of the triangle.
With the center point established, it is helpful to take one more step and establish our horizontal (or x) axis. I did this by setting my combination square to the depth of the center point, and drawing a line both left and right.
Now we can lay out the reverse quatrefoil itself. Begin by drawing a circle (technically describing a circle) around the center point with your compass. The diameter of this circle is arbitrary, I chose the widest diameter circle I could fit within my arch that still left a little room for the engraving tool. Next, shorten the distance between the legs of your compass and draw a slightly smaller circle, the distance between these two circles being the perceived thickness. This distance is best laid out by eye. If you are doing this on paper, you can draw a complete circle and erase later. If you are doing this on a difficult to erase surface like I was, you should leave a little room on each side of the four square axis lines. Effectively, you will be drawing four little arcs that start just after one vertical/horizontal line, and end just before the next.
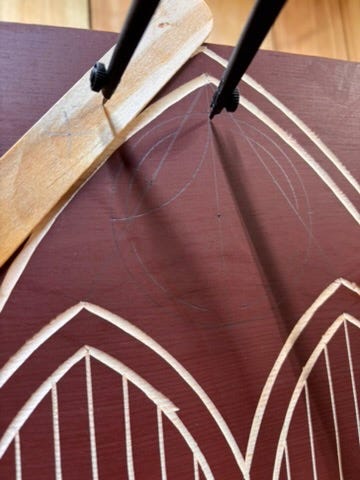
To find the point outside the circle from which the four quadrant arcs will be swung, set your compass to the diameter of the large circle, and scribe two outward arcs: one from the point at 12 o’clock, and one from the point at 9 o’clock. Where these arcs intersect, is the point from which you will swing an arc inside the circle and connect the 12 o’clock/9 o’clock points.
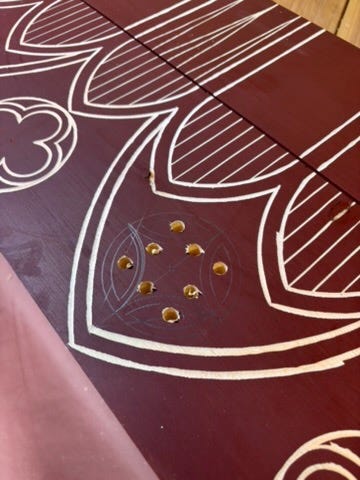
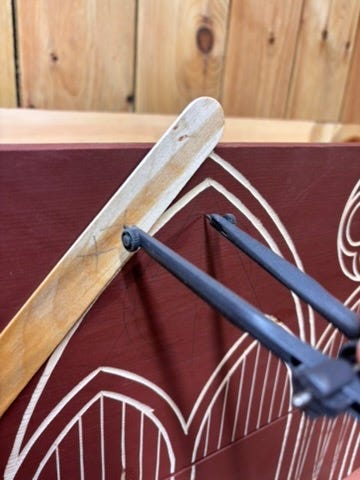
Here is a trick. To prevent leaving prick marks from the compass all over a piece of finished work, I use a small popsicle stick. Lay out the popsicle stick where you expect to find the center point of your new arc. This may involve some trial and error (you can see I made a few marks before getting it right). Once it is in the right position, you can scribe just the intersection of both points. Being careful to keep the popsicle stick in exactly the same position, place the non-pencil end of your compass at the intersection on the stick and swing your arc from there. This puts the compass prick into the popsicle stick, not your work.
Repeat this process for all 4 quadrants of the circle with your compass set to both the large diameter and the small diameter.
Note: If you are also engraving your design, as I was, it is handy to engrave these lines at the same time you draw them. Because your scribing point is on a popsicle stick, you lose it as soon as the popsicle stick is moved. If you drew all of your lines, and then engraved them, you will effectively be finding each scribing point twice. This is what I did in order to photograph the process, and it took another few minutes to find the points a second time.
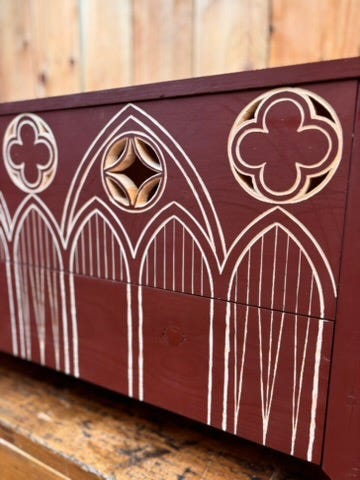
Making the window:
I am usually content to simply engrave the design. This looks great, and is quick to accomplish. For this piece I wanted the effect of a window, so I cut out the waste with a coping saw. I followed this up with a piece of 220 sandpaper on a stick, and chamfered the exterior edges with a chisel at roughly a 45 degree angle.